Fret
Level and Crown
This
is the method I developed for doing this job. The marker makes
it very accurate, fairly easy and provides excellent results.
I won't claim to be the first to come up with this method,
but as far as I know I'm the only one doing it.
The first
thing to do when starting this job is to remove the strings,
or move them out of the way (as I've done here). Next use
the truss rod and a straight edge to set the neck as straight
as possible, shown here.
Next
use a permanent marker to darken the top of all the frets
Now,
using a radiused block matching the fretboard radius(longer
is better) and 400 grit paper, LIGHTLY sand the frets until
the marker is removed from the fret crowns. It is important
to use very little downward pressure, and to support the neck
near the headstock to prevent causing the neck to deflect
when sanding. I should note that I generally ramp the frets
down towards the body from about the 17th fret to the heel.
Nothing too extream. I find that if you add relief to a neck
and use a low action it will typically buzz near the heel
because the relief is added between the 18th and about the
5th frets (primarily) leaving both ends of the fretboard high.
This treatment prevents/ minimizes the buzzing.
I now
know all the frets are level, and I have removed no more fret
by sanding than was absolutely necessary. If we were to stop
here and polish the frets it would be call a "fret leveling",
sometimes a "fret dressing". I avoid this in all
but the most minor cases as it leaves wide flat frets which
screw with the intonation and can cause minor buzzes.
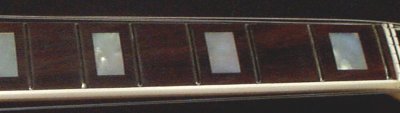
Now darken
the frets with the permanent marker again, and tape between
the frets.
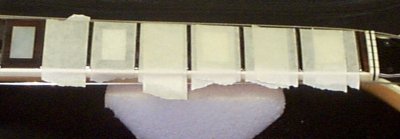
Make
no mistake, a single layer of masking tape is next to no protection
for the fretboard. I take all my files used for fretwork,
and sand/polish the edges which will/might come in contact
with the fretboard. On my crowning file I did both edges.
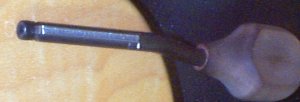
This
is an inexpensive crowning file which uses replaceable burrs.
It works, but I'll soon be upgrading to a diamond file. If
you are buying one I'd recommend the basic two sided diamond
file in med and wide (one on each side) and 300 grit. It costs
more, but if you do this more than once or twice it's well
worth it ( so I've been told)
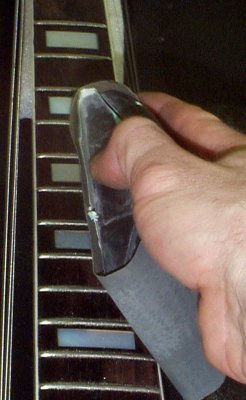
When
filing the crowns ensure the fret being worked on is inline
with your arm. This helps to keep the file on the fret. Also,
do not use alot of pressure. Too much pressure causes slipping
which can damage the fretboard, it causes the file to chatter
leaving little gouges, and it cuases your arm to fatigue more
quickly. Be patient and let the file do the work.
Each
fret is filed until all signs of the marker are removed, and
finished with a few backstrokes. The back stroke removes some
of the major roughness. The marker provides easy visual indication
of when enough fret has been removed, and where the filing
needs to be concentrated. (I was unable to photograph myself
for this step; I use both hands when filing the crowns)
Once
all the frets have been crowned, you may choose to redarken
the frets and use the radiused block with 600grit paper to
check your work by LIGHTLY sanding the tops and checking that
the marker is evenly removed from all the frets. I seldom
do this as the marker technique is extreamly accurate. Also,
you can use a short straight edge(3" or so) to check
for levelness as the work is progressing, I find I don't need
to do this either.
I then
use a flat jewelers file (with polished edge) to knock the
corners off of each fret.

Next I use 600 grit
paper on a sanding block to finsh the end bevel
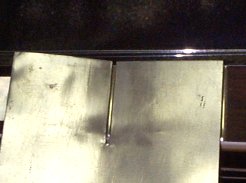
I now place this tin
shield (one can be made from most any thin piece of tin, or
even a pop can) to protect the fretboard when polishing the
frets. If the fretboard is rosewood or ebony, I generally
don't use it, I simply use the polishing as an opportunity
to clean and oil the fretboard as well. (USE IT on a finished
maple fretboard!)
The frets are polished
first with 600 grit paper (from end to end on each fret) and
then with a super fine scotchbright pad. I use my finger tip
as the "sanding block" as it will conform to shape
of the fret. I also wrap the paper and scotchbright pad around
the tip of my finger and go along the edge of the fretboard
polishing the edges of all the frets, this tecknique gives
a "broken in" feel to the fret ends and fretboard
edge. If the fretboard is going to be oiled I will buff the
entire fretboard with the scotchbright pad. The fretboard
is then wiped clean and a thin coating of boiled linseed oil
is applied, allowed to soak in for several minutes, and then
the fretboard is wiped dry.
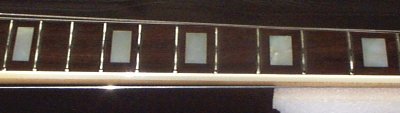
Here's the finished
frets, and oiled fretboard. This guitar started with very
worn frets. When the frets are very worn, they are effectively
wider. Sometimes this causes the crowning file to cut into
the sides of the frets slightly when restoring the original
crown profile. Switching to a wider profile crowning file
will prevent this, but will result in a different than original
(or desired)fret profile. I used the original profile in this
case.