Refrett
In order to do a professional refret, certain
tools are required. Among these, a fretting hammer, specialized
pliers, and radius block matched to the neck being done are
essential. Other tools which may be needed are a fine saw,
dremel tool w/ cutoff disk or nipping pliers. Add to this
almost every refret involves making a new nut, so those tools/skills
are also needed.
First, lets start with pulling the frets.
This is easiest to do w/ a pair of nipping pliers.
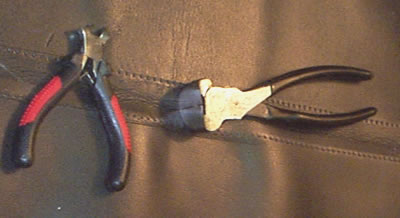
These are modified by grinding the face
so the edges are flush, and sharper than original. The small
ones are used for pulling, the large ones for cutting the
ends and undercutting the tangs on bound necks. The large
ones are kept very sharp. (care must be taken in grinding
not to overheat them as they will loose their hardness)
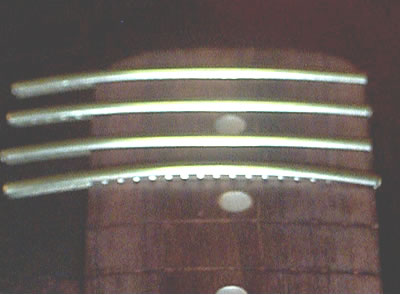
The frets are pulled by pinching the cutting
edge of the small pliers under the fret edges.
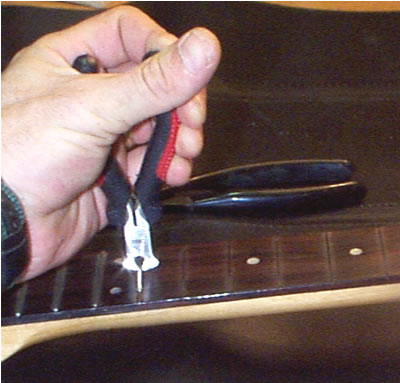
The larger pliers do not work as well here
due to the curvature of the fretboard/frets. Once the pliers
are started they are "walked" along. Best results
are obtained by moving the pliers to the side and re-pinching.
The slope of the inner face lifts the fret, and the flat outer
face helps hold the wood down against chipping. It is also
a good idea to heat the frets w/ a soldering iron prior to
pulling it to loosen any glue (quite hot, but not hot enough
to burn the fretboard) which might have been used previously.
If the work is being done on a maple fretboard, a razor knife
is used to cut along the edges of the frets to assist in separating
the fret from the finish, the heat helps here as well.
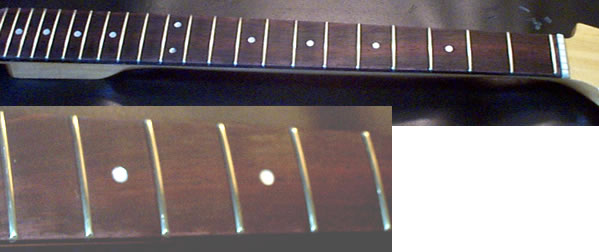
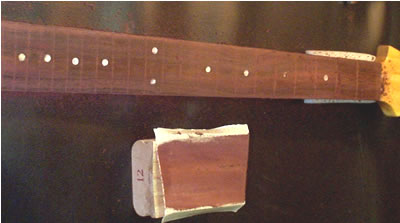
Once all the frets are removed, the fretboard
itself needs prepped. This neck had several minor issues.
A couple areas of wear, a couple large chips (the work was
begun by the owner prior to my finishing it, The pieces were
there so it was an easy repair), and several smaller chipouts
along the fret slots. There were heavy glue lines/ridges where
it appeared a few frets had been "glued down" at
some point. This neck uses a zero fret, but the slot for it
was very wide.
The first thing to do was sand the fretboard
using a radius block starting w/ 150 grit to remove the major
issues, and finishing w/ whatever grit makes you happy, 320
minimum. This neck should have been around 7-9 1/2" radius,
but most closely matched my 12" radius block. I chose
to keep it close to the same so I used the 12" block.
I could as easily have returned it to what it "should"
have been by using that block. (I happen to like a 12"
radius best, and no request was made to alter the radius from
existing)
Before beginning the sanding get the neck
as straight as possible w/ the trussrod and a straight edge.
This neck still had a slight backbow even w/ the truss rod
fully slack.
In order to fill some of the smaller chips
and wear spots which were too deep to remove w/ sanding, I
soaked the spots w/ thin superglue and filled w/ dust, then
soaking more superglue into the top of the dust. These are
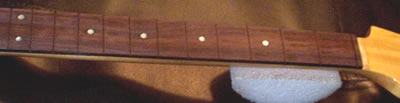
then sanded smooth with the final grits. When sanding the
fretboard I "ramp" the heel end from the end up
to about the 10th fret. This will eliminate 85% of fret buzz
issues w/ very low actions. If the fretboard is finished maple
this step is either skipped, or the fretboard gets refinished.
 (note
the removed nut)
(note
the removed nut)
Next I use a fretting saw (actually an
x-axto razor saw) to clean out the slots and make sire the
slots are deep enough. An x-acto razor knife can also be used
by grinding away the sharpened edge.
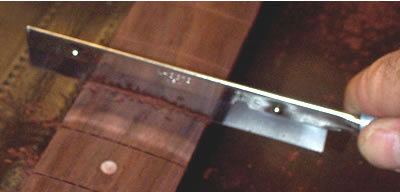
The slots may curve w/ the fretboard radius
and care should be taken to keep it that way if they are.
Now it's ready for the new frets.
The frets are bent into a radius using
the nipping pliers to help prevent any sharp bends.
If you buy the fretwire in one length,
it is easier to bend it all at once by coiling it.
The fret is bent into a smaller radius
than the fretboard. The smaller radius causes extra pressure
at the ends to help keep them from lifting.
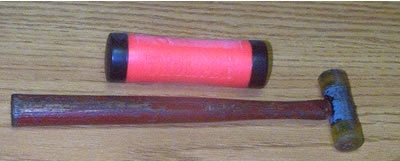
The fret is then driven in. I use a 10
oz deadblow "thumper", and a small plastic face
hammer. Starting at one end I drive the fret in and work my
way across, usually in a couple passes. Excessive hammering
in the center will raise the ends.
Using frets wider than original will hide
minor chipout and finish lines as on a maple fretboard, but
isn't absolutely necessary.
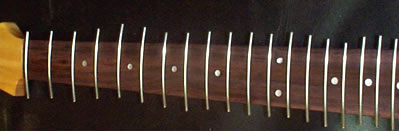
I find it better to let the fret overhang
at both ends. I can then overbend the overhanging ends to
ensure the fret ends are down. This does result in having
more trimming to do. The fret ends are then either nipped
or cut w/ a dremel. I used the dremel, it's a bit slower,
but nipping can deform the ends and cause them to lift slightly.
As previously mentioned, the zero fret
slot was huge, This required me to overbend the fret tang.
Care must be taken as it is easy to deform the fret doing
this. Special pliers can be purchased for bending the tang,
but I don't use them.
 (sorry
about the pic quality)
(sorry
about the pic quality)
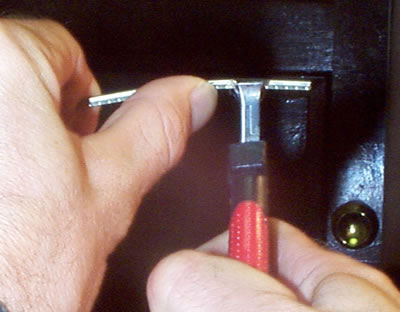
The next step is to bevel the ends and
file them flush along the edges. Bore doing this I ensure
all the frets are still fully seated and then seep a drop
of superglue into each end of every fret.
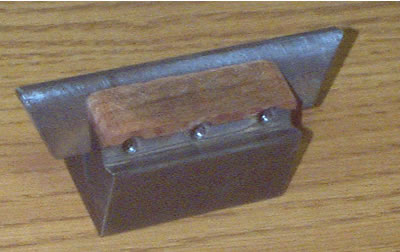
To bevel the fret end, I use a special
tool I made.
 (another
crappy pic)
(another
crappy pic)
This is a machinist's block which I added
a wooden sole and a modified file. A similar device can be
made w/ a file and a block of wood, or purchased from a specialty
supplier like Stew Mac. The beveling can also be done freehand.
The nicest thing about the block, besides making a consistent
angle easy, is that it exposes only enough file to bevel the
ends, allowing the file to miss the guitar body and headstock.
(picture of beveled fret ends too poor to
even use, sheese...)
The frets are now checked for straightness
by using a long straight edge, and then a shorter one. (keeping
in mind the heel ramp) If there are any issues the frets are
leveled and recrowned as necessary. Due to the remaining backbow,
I had to do this as well (I normally don't). Leveling and
recrowning was covered HERE.
The next thing to do is ease all the fret
ends and buff them down w/ 600-800grit paper. The edges are
eased using a crowning file, and the corners are knocked off
using a fine file (this is covered on the fret leveling pages)
I finish by using 800 grit crocus cloth wrapped around my
fingers to give the edges a "broken in" feeling.
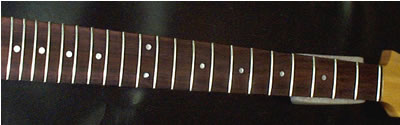
And the results of several hours work.....